
Keith Park and the Small Wing: The Tactics of the Battle of Britain
5 February 2018


 History,Short Factual Stories
Keith Park and the Small Wing
The Battle of Britain Tactics of Keith Park
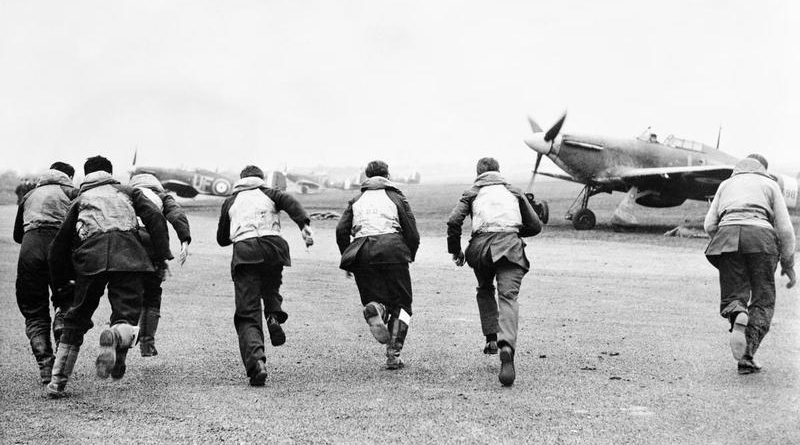
The Battle of Britain has become a story of legend about the Few in a desperate fight with an all-conquering enemy.
What is less remembered is that the Battle of Britain was the first battle that the Nazi war machine failed to win. Even less remembered is the type of tactics employed by the RAF in, if not winning, certainly not losing the battle.
Based in dogma over strategies and on personal rivalries, the conduct of the battle was overshadowed by political and tactical arguments raging within the RAF at the time. With the RAF High Command in virtual melt-down during the battle, it is impressive that Britain did not succumb during the battle.
By the time the Air Ministry produced their report on the Battle in 1941, which Churchill described as “A discredit to the Air Ministry”, the principle commanders during the battle had been removed from their positions. The report was produced largely by or under the influence of those who had disagreed with them.
So here’s the story about how Britain won the Battle of Britain and why, from a public perspective, it has remained largely shrouded in mystery ever since.
The RAF’s Preparation for the Battle
In the years leading up to the war it was appreciated that should any country, notably Germany, wish to conquer Britain it would require Air Superiority over British airspace. The job of preventing this was RAF’s Fighter Command.
The Head of Fighter Command from 1936 onwards was Hugh Dowding who set about designing an air defence system for Britain. His Chief of staff resonsible for implementing this was Air Vice-Marshall Keith Park.
The command and communication system they established (known as the Dowding System) divided the country into regions with the defence of each region falling to an allocated Air Group. Within each region there was a dedicated network of telephone lines that fed information about approaching enemy planes from a series of radar stations and from members of the Observer Corps acting as look-outs to each Group’s control centre.
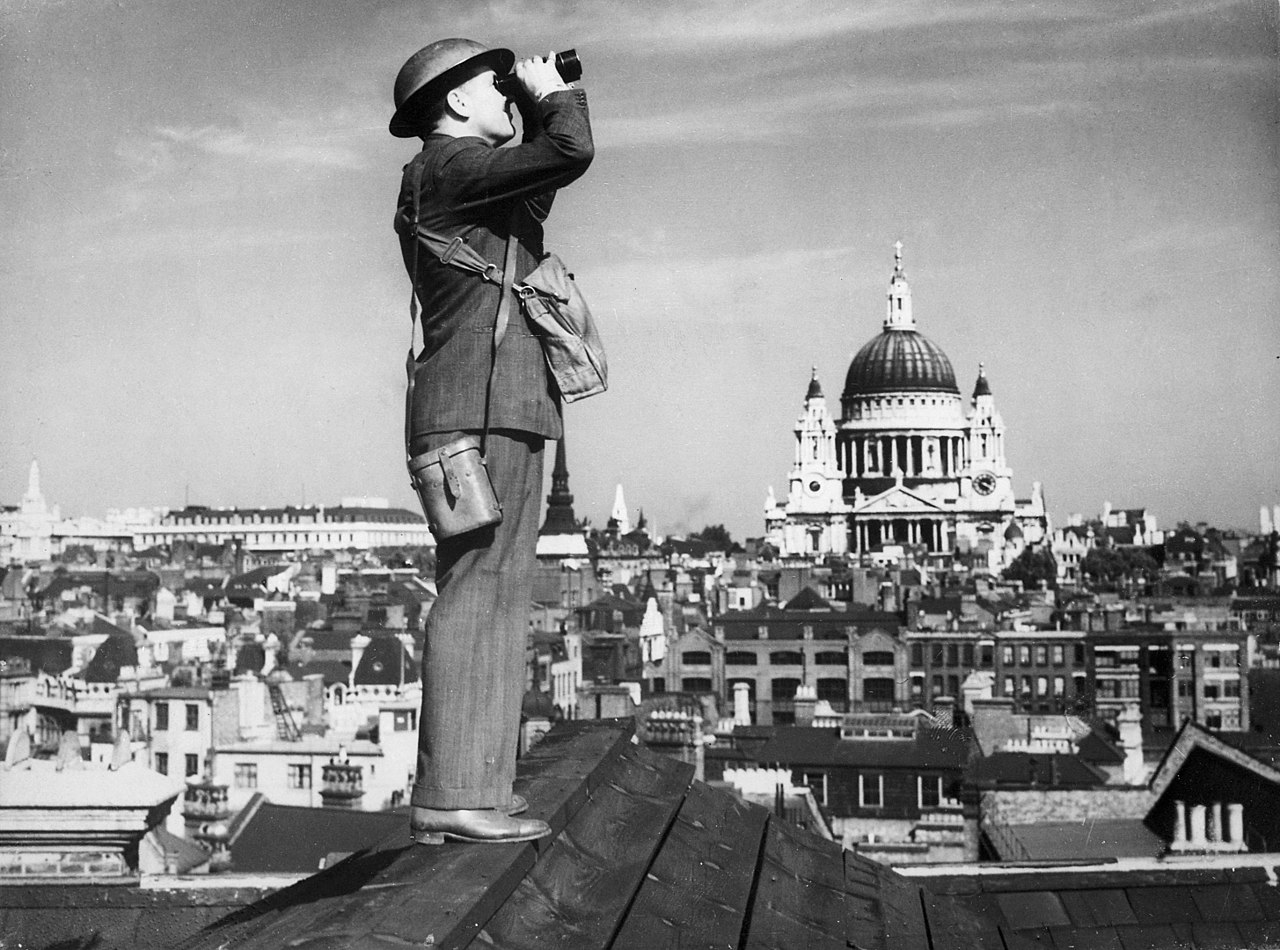
Observers keep watch over London during the Battle of Britain
The most important of these air Groups was 11 Group responsible for the area south and east of a line drawn from the wash to the Solent. 11 Group’s task was to prevent the Luftwaffe gaining control of the skies in this part of the country in, in so doing, make it impracticable for the German’s to undertake an invasion. It’s second task was to protect from bombing the towns, cities, ports and industry (many Spitfires were build in Southampton) within which is included.
So in 1940 the command of 11 Group was the most important Operational Command in the RAF. When war came, Dowding gave command of the vital 11 Group to Keith Park.
Dowding’s Battle of Britain Tactics
Dowding’s strategy was based upon two important factors:
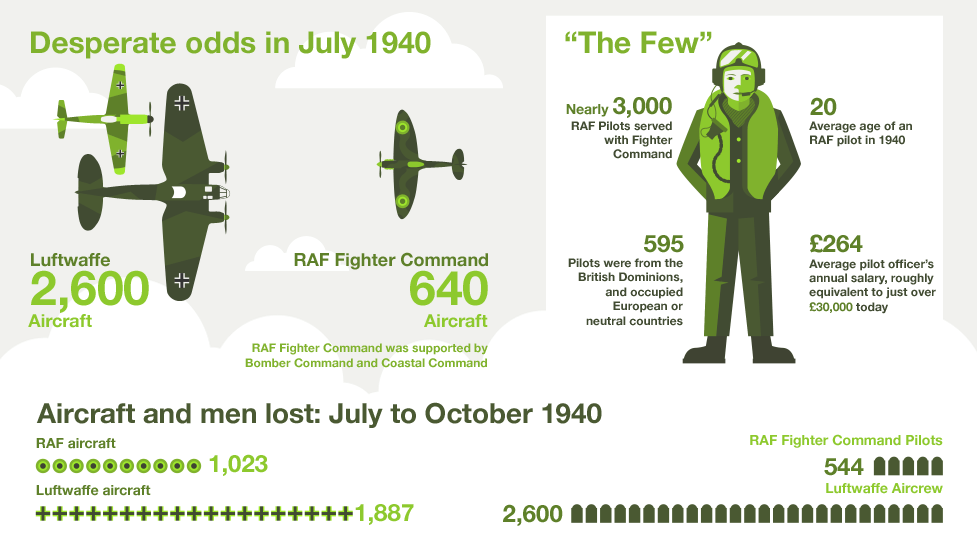
- The RAF was vastly out-numbered by the Luftwaffe and could not afford a potential high number of losses in massive aerial duels, and
- The RAF did not have to win the Battle of Britain, they only had to avoid defeat to prevent an invasion of Britain.
So Dowding’s Battle of Britain tactics, which were supported and executed by Keith Park as the Battle Commander, sought a steady level of Luftwaffe attrition to prevent the Nazi’s gaining control of the air that they required for an invasion. This was achieved by using a constant rotation of small patrols of fighter planes that could responded quickly to enemy attacks, continuously harassing the enemy and breaking up their formations before they reached their target. This allowed for enemy bombers to be picked off. It also meant that there was never a time when all the fighter planes would be on the ground at the same time – a time when they are at their most vulnerable.
Leigh-Mallory thought differently. He argued that by attacking the enemy with the maximum number of aircraft available, the Luftwaffe could quickly be driven off and that this, in the longer term, would reduce casualties among the RAF pilots. This tactic was known as The Big Wing and was being strongly advocated at the time by a friend of his, the leader of 242 Squadron (part of 12 Group), Douglas Bader.
In reality the theory of The Big Wing was not new; it had been around for some time within Fighter Command. This tactic required an in-air assembly of an entire wing of four or five squadrons because that number of planes could not take off from a few airfields all at the same time. Once assembled, which itself took about 15 minutes, they would attack in force enemy planes.
The problem was, as pointed out by Keith Park in an interview in 1961, his tactics were to, where ever possible, attack the enemy before they reached their target and before they could drop their bombs. On a few occasions during the battle, 12 Group were asked to assist 11 Group and on that basis should have followed Park’s command. Instead they assembled their Big Wing but by the time they engaged the enemy, as Keith Park said, the enemy was on its way home and the damage had been done.
It also became apparent that the Big Wing tactic did not fit with Dowding’s radar and communication system which, at that time, was unable to provide sufficient warning of an enemy attack to allow time for the assembly of a Big Wing.
The Small Wing
Dowding rejected Leigh-Mallory’s Big Wing theory as an option as one of the RAF’s Battle of Britain tactics. Park never had any intention of using it; instead in ironic fashion he nicknamed his Battle of Britain tactics, The Small Wing.
Churchill had said of Admiral Jellicoe during the First World War that nobody else was capable of loosing the war in an afternoon. This remark is even more pertinent about Keith Park during the Battle of Britain. Had he lost the Battle, Britain would have been laid open to invasion and possible defeat. Leigh-Mallory did use The Big Wing a few times during the Battle and extensively a year later in 1941. Its use was to prove costly with high losses for the RAF. If that had happened during the summer of 1940 the most likely result would have been that the RAF would have lost the Battle of Britain.
Trafford Leigh-Mallory did not survive the war and has never been able to explain his part in this story. However, Douglas Bader did attempt some years later to put some perspective on the Big Wing controversy. He insisted that both he and Leigh-Mallory wanted the Big Wing tactic enacted in 12 Group only. According to Bader, he said they both felt that it was not possible to use it in 11 Group, as the Group was located too close to the enemy and there would not have been enough time to assemble.
However, when Leigh-Mallory did take over 11 Group after Park was dismissed, he did implement the Big Wing tactic in that Group. The results were poor – 11 Group lost four planes for every one enemy plane shot down.

Leave a Comment
You must be logged in to post a comment.